To
discover the content of this blog visit the "summary" page.
Introduction
Here
is a beautiful landscape, probably in Crete, with a mill along the Mediterranean (photo found on the internet) that I intend to reproduce
the Adobe Illustrator
(CS5).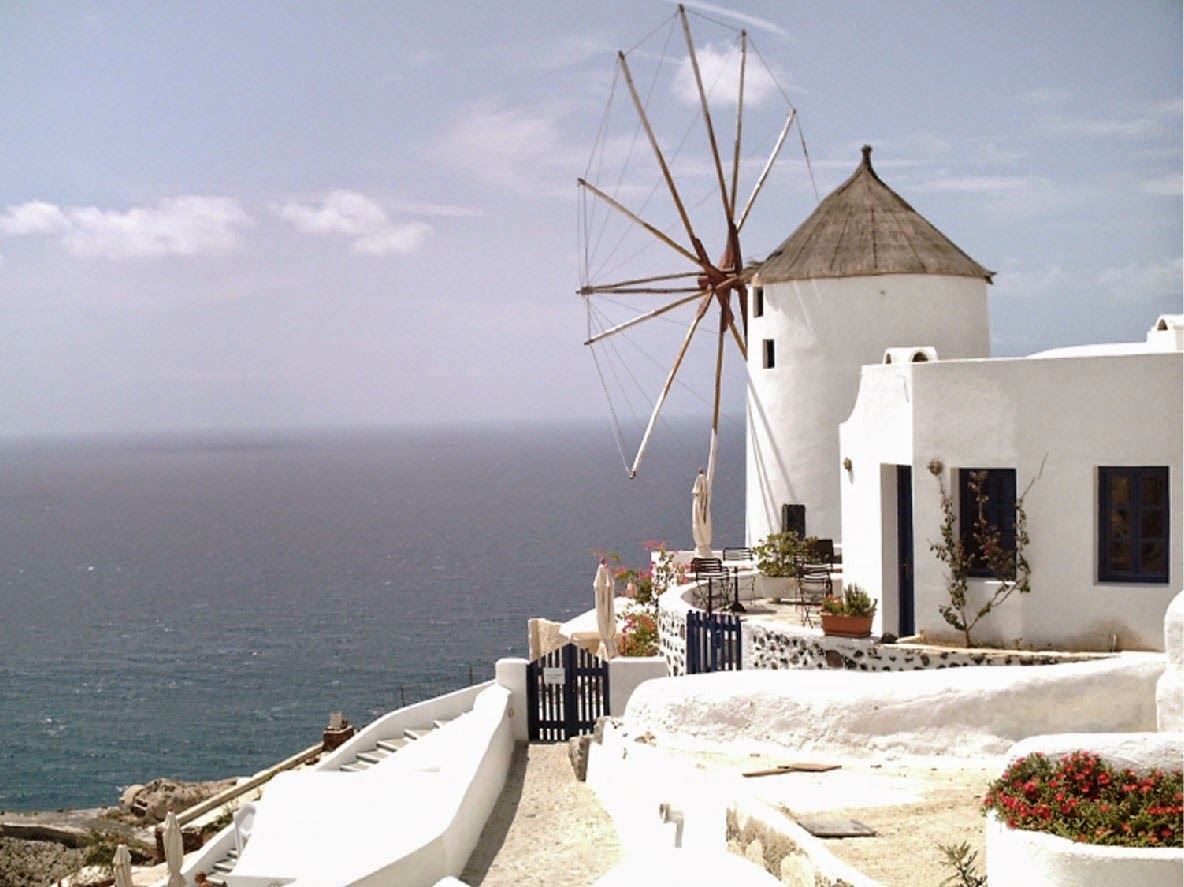
The final result after many hours of work is as follows:

I
have split the realization into 5 parts:
•
the house• the terrace
• the mill
• the foreground
• the sea and sky
The house
The
drawing of the house begins with a
path of white color (RGB =
255, 255, 255) and Feather 3 pixels:

The
roof is a linear gradient of 2
colors (angle = -85 ° and transparency
"Darken") described below:
·
Location 0%, RGB = 254, 254, 254· Location 92%, RGB = 163, 157, 162 (Distribution: 86-14%)
Read the post "Notation for color gradients"
for more information.

The wall on the right side
is a linear gradient of 2 colors (angle
= 0 ° and feather 2 pixels) described
below:
·
Location 27%, RGB = 206, 206, 206· Location 100%, RGB = 179, 176, 177 (Distribution: 13-87%)

The
shadow on the wall is a linear gradient of 3 colors (angle = -161 °, transparency "Darken" and opacity: 70%) described below:
·
Location 0%, RGB = 193, 190, 191· Location 59%, RGB = 217, 217, 217 (Distribution: 51-49%)
· Location 100%, RGB = 168, 168, 168 (Distribution: 71-29%)

The
first window starts with a gradient mesh for background design:

Followed
by the
paths of colored window panes
(RGB = 29, 35,
50) and feather 2 pixels:

Darker paths draw the frame around the window. The
second window is achieved in the same manner.
The bottom of the wall
is dirtier (probably because of the ferruginous water from the wellbore) and made with
a gradient mesh into 2 parts.

The watering system is designed with
two darker paths
(see below).
The second brighter wall is
made with a linear gradient of 2 colors (angle
= 75 ° and
transparency "Darken") described below:
·
Location 56%, RGB = 254, 254, 254· Location 100%, RGB = 163, 157, 162 (Distribution: 72.5-17.5%)

The
door is drawn using 2 paths.
The first is a linear gradient of 3 colors (angle = 0
° and Feather 3 pixels) described below:
·
Location 0%, RGB = 172, 166, 171· Location 53%, RGB = 163, 157, 162 (Distribution: 31-69%)
· Location 86%, RGB = 204, 204, 204 (Distribution: 50-50%)

The
second is a path of color (RGB
= 21, 27, 41) and Feather 3 pixels:

Without
giving more details of paths:
·
The door is completed with a (small) handle · The house is complete with outdoor lighting (green arrows) and the air vents (red arrows).
See the following picture:

The
rosebush is made with an object from my personal library (image treated with
the "Live Trace" function
Illustrator). The "flowers" are from the standard library of the symbols of Illustrator (red arrows).

Closed parasols are gradient meshes.

The low
walls of ochre color present no difficulty and are not thus described in
detail.

The flowery
shrubs are realized as the rosebush with objects from my personal library and
the flowers come from the standard library of the symbols of Illustrator (red
arrow).

The terrace
The drawing
of the terrace begins with the low wall of the right-hand side which is a
linear gradient of 3 colors (angle = 0 ° and Feather 2 pixels)
described below:
·
Location 0%, RGB = 237, 234, 232· Location 18%, RGB = 248, 248, 248 (Distribution: 56-44%)
· Location 91%, RGB = 163, 157, 162 (Distribution: 21-79%)

The
top of the small wall is a path of color (RGB = 254,
254, 254) and 2
Feather pixels:

The
tiles inlayed in the small wall are made with paths of color
RGB = 21, 27,
41 and 2 pixels Feather:

Without
detailing the realization of the vase, the main plan is a linear gradient of 3 colors (angle = 172 °), described below:
·
Location 0%, RGB = 90, 28, 26· Location 27%, RGB = 255, 246, 226 (Distribution: 87-13%)
· Location 99%, RGB = 220, 186, 146 (Distribution: 51-49%)

The
plant in
the vase is also an object from
my personal library (green arrow in the image below).
The
inner part of the left-hand side small wall is a linear gradient of
3 colors (angle
= 172 °,
and feather 1 pixel), described below:
·
Location 0%, RGB = 140, 129, 126· Location 44%, RGB = 173, 173, 173 (Distribution: 55-45%)
· Location 100%, RGB = 184, 178, 166 (Distribution: 60-40%)

An
"Inner Glow"
effect is applied with the following
options:
·
Mode : multiply· Opacity : 75%
· Blur : 5 pixels
· Radio button : "edge”
The outside
wall left-hand side is a linear gradient of 3 colors (angle = 50 ° and Feather 1 pixel), described below:
·
Location 0%, RGB = 253, 242, 223· Location 53%, RGB = 248, 248, 248 (Distribution: 31-69%)
· Location 98%, RGB = 163, 157, 162 (Distribution: 61-39%)

The
top of the low wall is a path of color (RGB = 254,
254, 254) and 1
pixel Feather:

Without
giving details of the realization, the drawing of the terrace continues with the dark edge of the left low
wall, the inlayed blue tiles and the big vase in the background containing
the plant through the objects of my
personal library (green arrow).
Then I realize the drawing of the 4 garden
tables (red arrow):

As well as the drawing of 4 chairs (from examples taken on the Internet):

The small gate of blue color (RGB = 29, 40, 68) is then added.

The
drawing of the terrace ends with the
tiled floor made from an image
taken on the internet (red arrow) transformed with Photoshop then "vectorized" with Illustrator (green
arrow), 25% opacity:

Finally,
the drawing of the house and its terrace is realized
as shown below:

The mill
The drawing
of the mill begins with a linear gradient of 3 colors (angle = 5 ° and Feather 2 pixels), described below:
·
Location 0%, RGB = 231, 227, 224· Location 18%, RGB = 248, 248, 248 (Distribution: 37-63%)
· Location 91%, RGB = 168, 168, 168 (Distribution: 21-79%)

Then a path that overlay the previous is filled with color RGB = 168, 168, 168, transparency "Soft Light" and opacity 60% with "sponge" effect with the following options:
· Definition : 12
· Smoothness : 5

The
drawing of the thatched roof begins with a linear gradient of 3
colors (angle = 5
° and Feather
2 pixels), listed
below:
·
Location 0%, RGB = 149, 140, 130· Location 20%, RGB = 191, 179, 167 (Distribution: 52-48%)
· Location 91%, RGB = 89, 81, 76 (Distribution: 30-70%)

The
shadow of the roof is made with a
path under the above, but slightly less tall, with a "drop shadow" effect
whose options are:
·
Mode : Multiply· Opacity : 75%
· X Offset : 0 pixel
· Y Offset : 3 pixels
· Blur : 3 pixels
· Radio button : color (black)

The
"straw" appearance of the thatched roof is made with a path of color
RGB = 149, 140, 130, Feather 2 pixels and containing 2 effects:
A
"Film Grain" effect with the following options:
·
Intensity : 40· Contrast : 50
· Grain Type : vertical
A
"Smudge stick" effect with the following options:
·
Stroke
Length : 5· Highlight : 10
· Intensity : 8
The wooden
beams that support the straw are lines as shape "Charcoal - Pencil ",
in thickness from 0.75 to 1 pt. and color RGB = 83, 75, 54:

Openings on the front of the mill (red arrow) are not detailed.
The
blades of the mill (green arrow) are performed with different paths, an example of which is given below. This is a linear
gradient of 2 colors (angle = -156 °), described
below:
·
Location 0%, RGB = 235, 235, 235
·
Location 61.5%, RGB = 65, 34, 33 (Distribution:
39-61%)

The
shadows of the blades
on the front of the mill are paths of
color RGB = 193,
190, 191:

The threads
that hold blades are lines of color RGB = 119, 190, 191 with opacity 50 %:

The foreground
The drawing
of the foreground begins with the low wall of foreground which is a linear gradient
of 3 colors (angle = 43 °), described below:
·
Location 0%, RGB = 237, 234, 232
·
Location 18%, RGB = 248, 248, 248 (Distribution:
56-44%)
·
Location 91%, RGB = 163, 157, 162 (Distribution:
21-79%)
We apply
then a 8.5 pixels Feather and a "Craquelure" effect with
the following options:
·
Crack Spacing : 12
·
Crack Depth: 1
·
Crack Brightness: 9

The foreground low wall (right side) is
a path of color RGB = 179, 172, 177 to
which we apply a path of the same
size with a gradient of 3 colors similar to the precedent and transparency is "Lighten":

The
left part the low wall foreground is made the same way. The
gate foreground is a single stroke color RGB
= 35, 44, 58 with
a 2 pixels Feather:

The
inside of the left wall is a path of RGB
color = 212, 208, 200 with Feather 2
pixels:

The
inside of the wall that accompanies the
staircase to the beach is a linear gradient of 5 colors (angle = 0
°) as described below:
·
Location 3%, RGB = 179, 181, 175· Location 31%, RGB = 149, 140, 130 (Distribution: 50-50%)
· Location 50%, RGB = 166, 169, 173 (Distribution: 54-46%)
· Location 74%, RGB = 193, 190, 191 (Distribution: 50-50%)
· Location 87%, RGB = 177, 174, 172 (Distribution: 53-47%)
To
which are applied feather 3 pixels and an
"Inner Glow" effect with the following options:
·
Mode : overlay· Opacity : 75%
· Blur : 5 pixels
· Radio button : "edge”

The
staircase leading
down to the beach is made with straightforwardly
paths that are not detailed (a step is shown
below):

The
staircase built steps after steps:

The shadow of the wall
foreground is a path of color RGB = 110,
112, 97, transparency "Multiply"
Feather 3 pixels:

The
driveway at the entrance to the house is paved with tiled floors that cover all of the following surfaces (tiling was performed as previously reported):

The
tiling below is partially
covered with a path of color
RGB = 251, 253, 231
and transparency "Soft
Light" to reproduce the reflection of the sun on the surface:

The right low wall of the path is also covered
with this tiling:

The
drawing of the drain holes is not a problem and therefore is not detailed.
The
basin on
the right filled with flowers is a
linear gradient of 3 colors (angle
= 0 °), as described below:
·
Location 0%, RGB = 237, 234, 232· Location 20%, RGB = 248, 248, 248 (Distribution: 39-61%)
· Location 91%, RGB = 163, 157, 162 (Distribution: 24-76%)
We apply
then a 6 pixels Feather and a "Craquelure" effect
with the following options:
·
Crack Spacing : 35· Crack Depth: 1
· Crack Brightness: 9

Flowers
(green arrow) are made with images from my personal library (red arrow):

Here
is the result (shown below) after the work described so far:

But the
most difficult part is still to be made …
The sea and sky
Indeed, for me the drawing
of the sea (and sky) is the real difficulty of this work!
I
decided to simplify my life by avoiding
drawing rocks (red
arrow).

The
suite is
drawing of the sky that begins
with a beautiful linear gradient
with 3 blue colors
(angle = 90 °) as described below:
·
Location 0%, RGB = 203, 204, 225· Location 53%, RGB = 163, 186, 226 (Distribution: 50-50%)
· Location 100%, RGB = 102, 138, 209 (Distribution: 44-56%)

The background of the sea is also a linear gradient of 5 blue colors (angle = -90 °), as described below:
· Location 10%, RGB = 146, 161, 206 (Distribution: 32-68%)
· Location 37%, RGB = 63, 125, 184 (Distribution: 50-50%)
· Location 67%, RGB = 0, 103, 184 (Distribution: 46-54%)
· Location 100%, RGB = 0, 79, 143 (Distribution: 52-48%)

The
waves are
made with paths of different colors and
thicknesses, some examples of which
are described here. The 2 paths below are RGB color =
21, 36, 54, transparency "overlay", thickness 2 pt. and brush "Chalk -
Scribble":

The following line is color RGB = 157, 192, 220, thickness
2 pt. and brush "Chalk":

The following line is RGB color = 164,
182, 222, transparency "overlay", thickness 1 pt. and brush "Chalk":

The following line is RGB color = 134, 156, 176, transparency "overlay", thickness 0.75 pt. and brush "Chalk":

The following line is RGB color = 41, 79, 110, transparency "overlay", thickness 0.5 pt. and brush "Chalk":


This
technique to draw the sea is personal;
I do not know any other. But if you have other solutions
please give them to me...
For
clouds, several solutions
are used. This may be a path of color
RGB = 102, 102, 102,
transparency "Soft Light", thickness
1.5 pt. and
brushes "watercolor" coming from the standard library Illustrator:

This
can also be a drawing of the cloud
as gradient mesh, from my personal library, as
shown below:

The
final result is that shown in page one of this post...

Aucun commentaire:
Enregistrer un commentaire